
Kayso, I baked these recently after years of canele envy, and managed to pull it off the first time, thanks to the labor of others on the internet, ever generous with their time and skills.
For the first time in my life, I felt like that kid who never went to class, then asked you for all your notes, and aced the exam. I did have to tweak the recipes, basically cherry-picking best practices. There are lots of notes below, if you want to check out the process, but here’s the recipe.
INGREDIENTS
1 tbl vanilla bean paste
500 ml whole milk
200 grams white sugar
100 grams a/p flour
50 grams salted butter, melted and cooled but still liquid
2 eggs at room temperature
2 egg yolks at room temperature
60 ml rum (I used Myers)
for the mold
40 grams beeswax
60 grams unsalted butter
12 canele molds (see notes below).
INSTRUCTIONS
Bring milk to boil. Turn off heat and stir in vanilla. Set aside.
Whisk together the sugar, eggs and yolks. The mixture will be thick and perhaps crumbly. No, you didn’t do anything wrong (yet). Add the melted butter slowly to the eggs and whisk until blended.
Gently temper the eggs by adding 6 tablespoons, a tablespoon of at a time, of the warm milk to the eggs while whisking (you want to avoid adding hot milk to eggs too quickly because you don’t want the eggs cooked). Once your mixture is warm, slowly whisk in the remaining milk. Whisk in the rum. Transfer the batter to a measuring cup with a pour spout, and place it in the refrigerator for a minimum of 24 hours and up to 5 days.
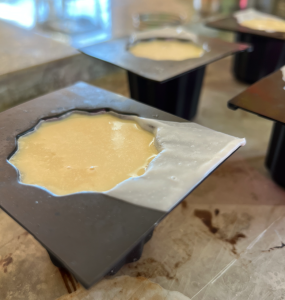
When you are ready to bake the canelés, melt the beeswax and butter in a small pan and swirl to combine. Pour the mixture to the brim of the first mold and immediately pour the mix back into the pan (I used a pipkin to melt the mixture because it has a pour spout). Repeat until each mold is coated with the butter-beeswax mixture.
Preheat the oven to 450 degrees. Remove batter from the fridge and gently whisk or stir it to combine it (before adding the batter to the molds, you will stir it again). Don’t overmix. Fill the molds to near the top and place on a cookie sheet lined with foil (the wax and butter make a bit of a mess and when heated, it will smoke a bit, so the foil makes it easy to clean. Parchment has a tendency to burn).
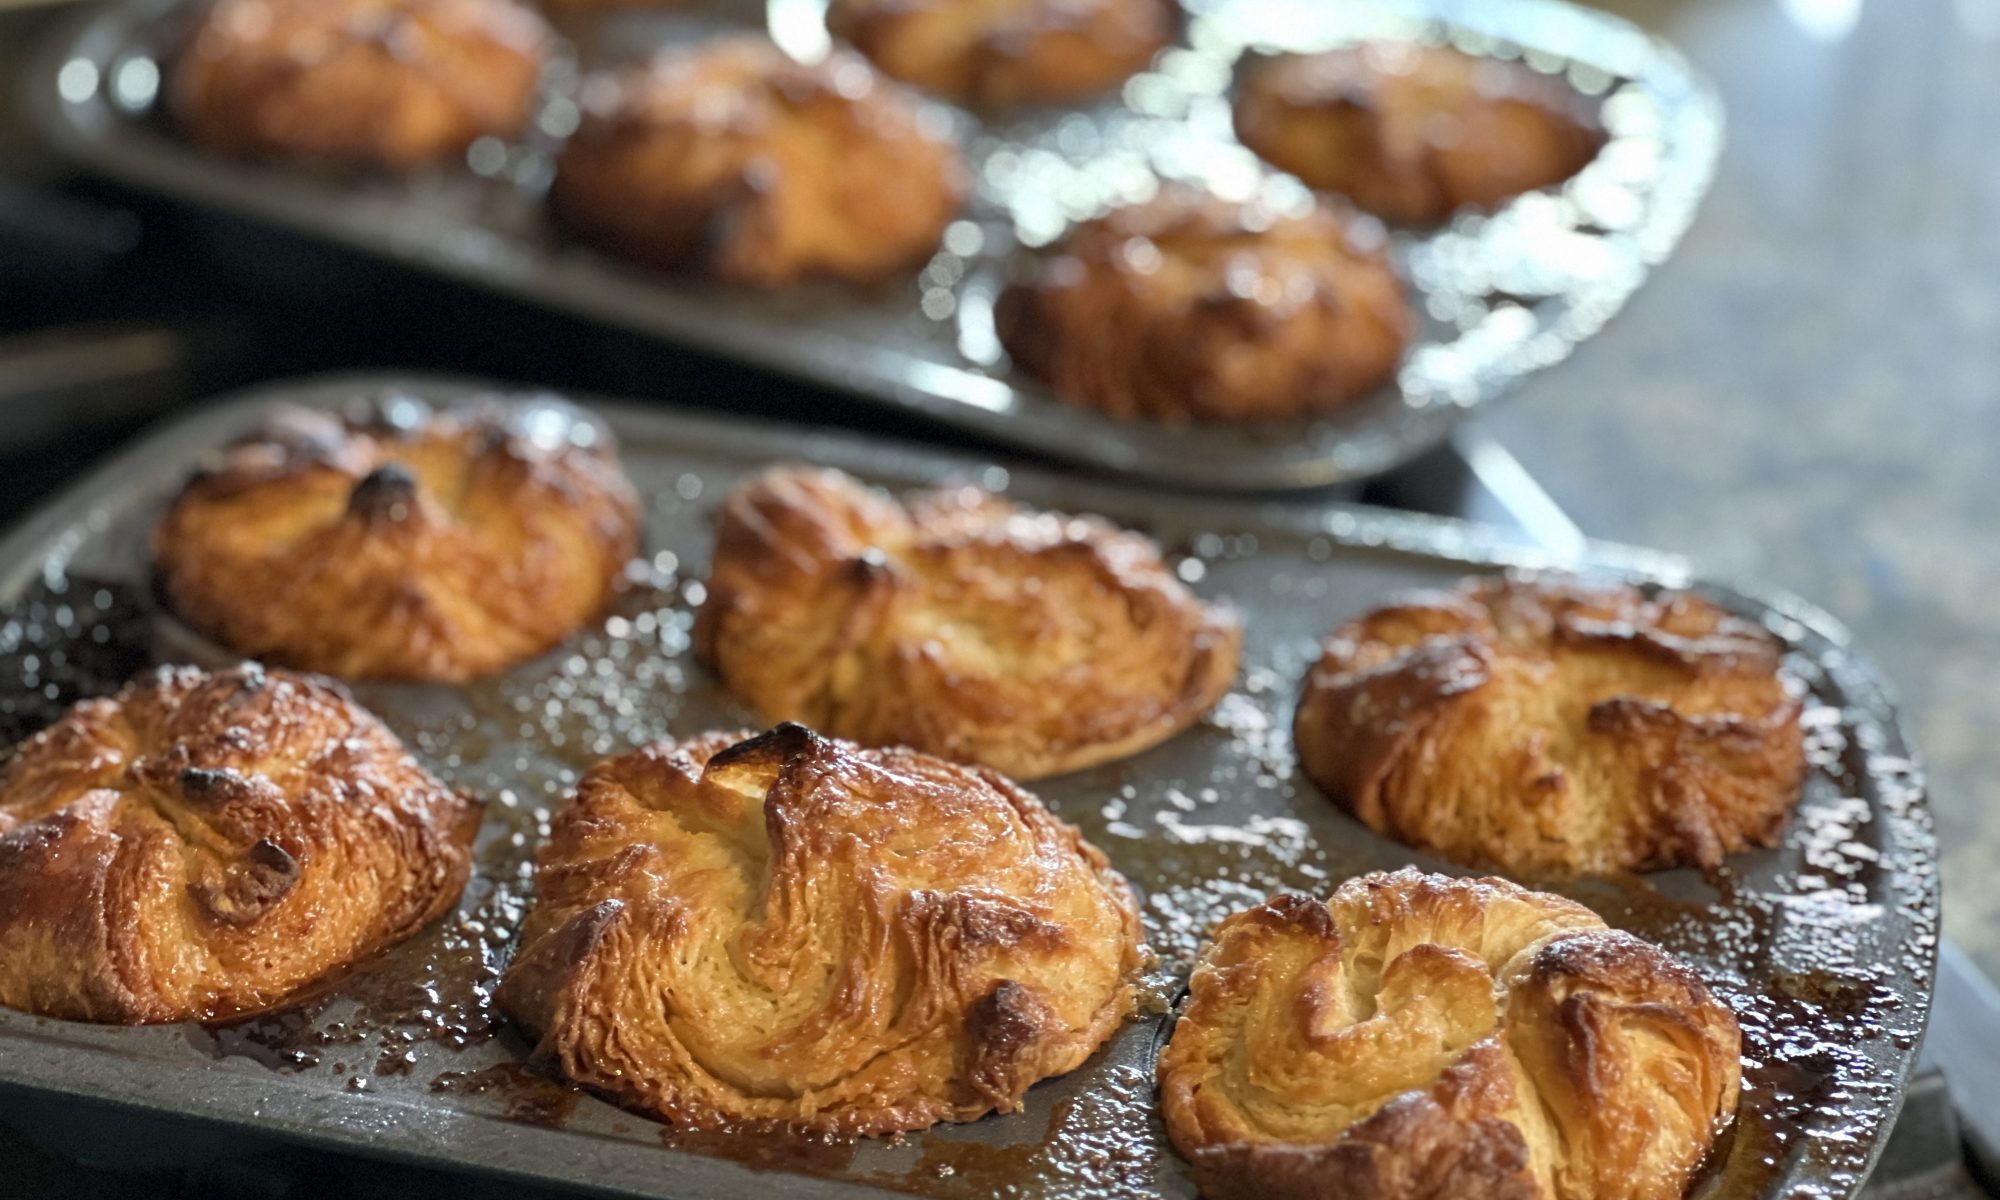
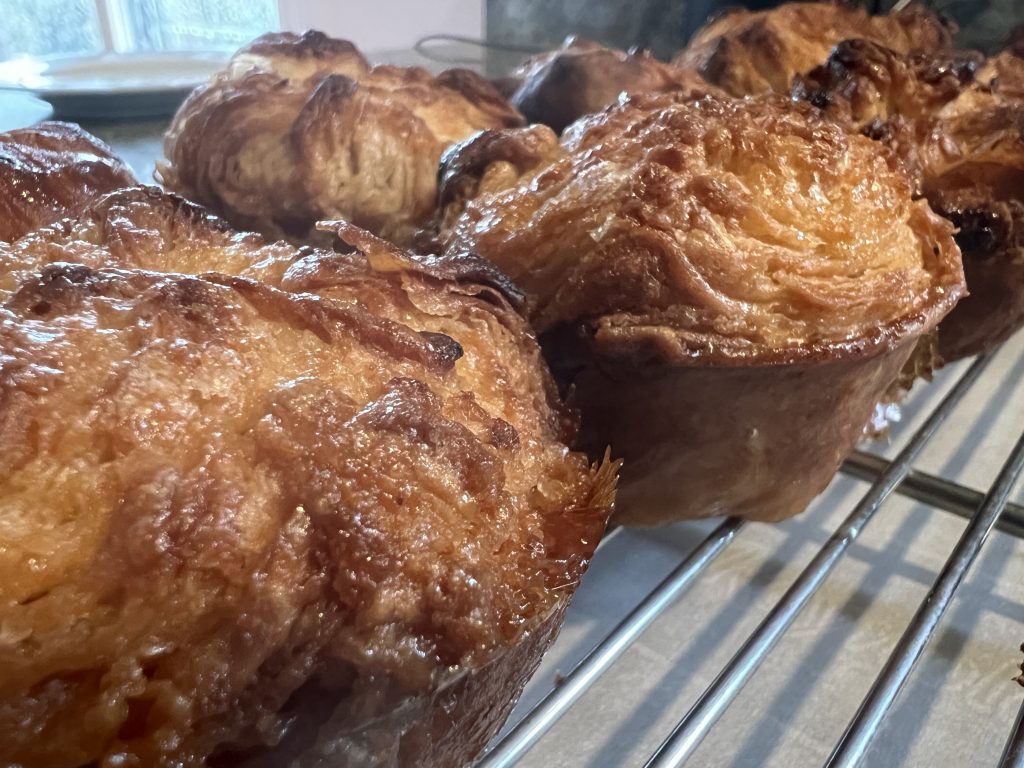
Bake the canelés for 25 minutes, then turn the heat down to 375 and bake for another 35–30 minutes until the caneles are very dark brown.
Remove from the oven. After one minute, Invert each mold onto a plate. The canele should easily slip out of the mold. Congrats!
LOTS OF NOTES:
- I read a ton of blogs and a lot said that you should not overbeat the mixture or the caneles will “muffin top.” I also read a ton of blogs that said this is bullshit. I am team bullshit. Whisk until blended, because it’s going to sit for at least 24 hours.
- There are some unorthodox blog posts out there that try to get the trademark crunchy outside without beeswax; they will tell you all you need is butter. My understanding is the beeswax is not only used for perfect color, but for texture and flavor. Don’t skip it. Also? Don’t try to “brush” your molds with the butter-wax mixture. You will not be pleased. Your wax will catch in the brush and the molds won’t be evenly coated. The pour-in-pour-out method works perfectly. Toss out the remaining bit of wax (which isn’t much).
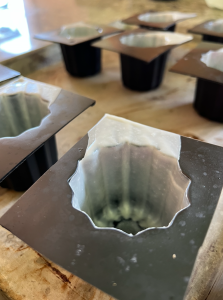
- These were made with silicon molds because I’m not made of money. Make sure you confirm your molds are safe up to 450 degrees (or hotter). Some silicon is not safe. I’d prefer to have the copper molds, but I’m waiting for a rich boyfriend.
- Let’s talk molds! First, these were actually part of a single 8‑piece tray. I cut them with a scissors into individual molds. In my humble (brag) opinion, this is the only way to not either kill yourself trying to coat them, or kill yourself with third degree burns trying to get them out. Once cut, they are easy to fill, and easy to unmold. DO IT!
- More on molds! In looking at the liner notes for a few molds for sale, a lot of the Teflon (non-stick) pans note in the fine print that they are not designed for temperatures over 400. You should not be using Teflon anyway (unless you want babies without nostrils), but seriously, check to make sure it’s safe.
- Just do it. Look, what’s the worst thing that can happen? A smoky house and some wasted flour and butter?
- Last note (probably): I think these taste better cold and at least a few hours old. Bon chance, bitches!